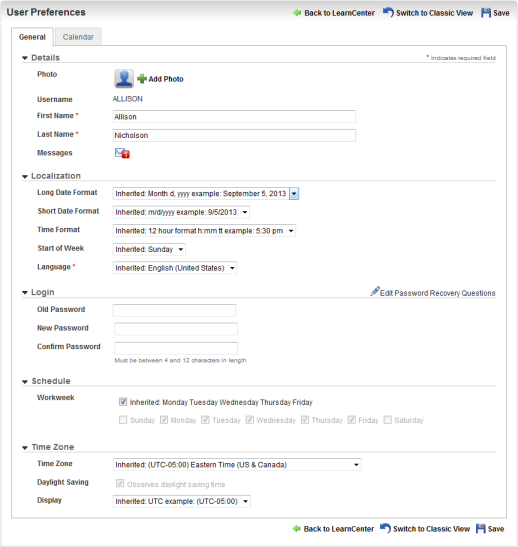
The User Preferences page enables Users to make updates to various standard fields and settings. You have the ability to control what displays on this page by selecting the appropriate items on the User Field Settings page. The example below shows what the page could look like if an Admin made those particular fields editable by Users on the User Field Settings page.

|
The Login section displays by default, but you can have it hidden if you do not want to give Users the ability to change their own passwords. Contact Customer Support through My Oracle Support to request that these fields be hidden. |
Notice that you can give Users the ability to select their own Localization and Time Zone preferences. The settings they select override the default LearnCenter settings for that Users only. Any place date, language, or time formats are displayed in the LearnCenter, the User will see his selections.

|
All transcript-type items such as Gradebook, Assignments, Courses, Enrollments, Learning Plans, Certification Profiles, and Assessments/ Surveys are only visible on the classic Control Center at this time. (Or you can add the appropriate dynamic objects to your LearnCenter pages if you prefer.)
You can access the classic Control Center by clicking the Switch to Classic View. At this time there is no end of life date scheduled for the classic Control Center. |
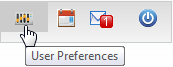
Users can access this page by clicking the User Preferences icon after they log in.
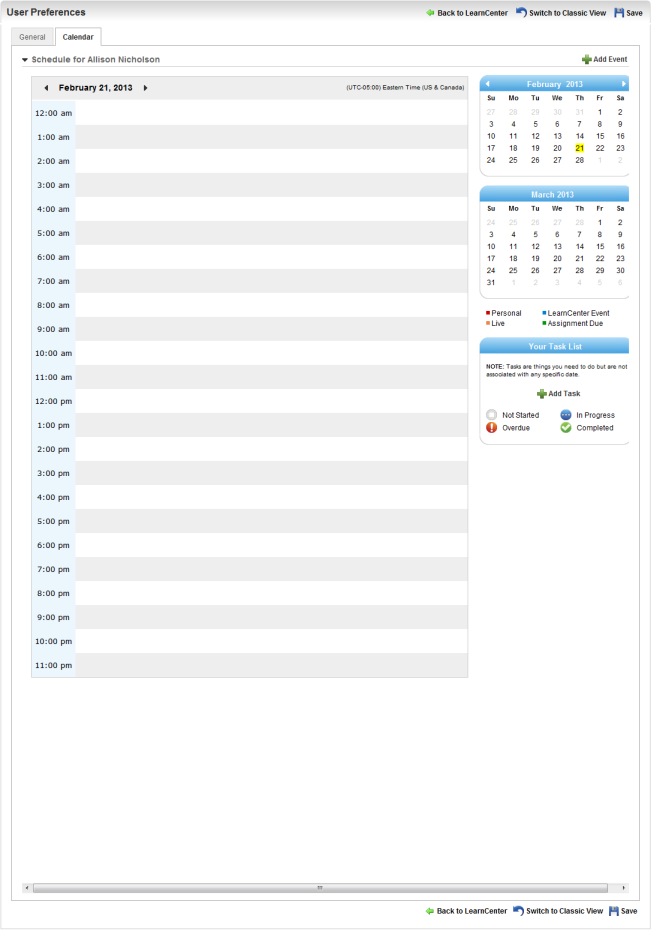
They can view and add events to their calendar by clicking the Calendar tab. By default it displays the current day's schedule. You can easily switch to another day or month by clicking a date on the appropriate calendar. Notice that the User's time zone setting is also displayed on the calendar. The User's first and last name display at the top of the calendar: Schedule for [First Name Last Name]. The selected time format is also displayed at the top of the page
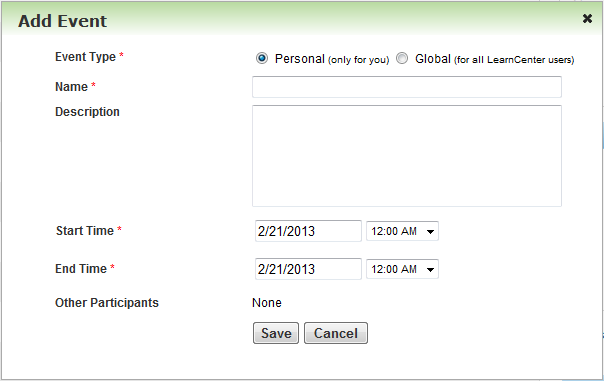
To add an event to the calendar:
Users can create their own task list. The list is not associated with any particular date on the calendar. To create a list:
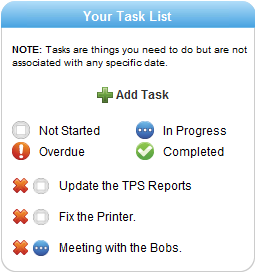
Notice that you can apply a status to the tasks. Click  next to a task to change the status. Click it again to change the status again until you are displaying the status you want. The icons display in the following order when clicked: Not Started, In Progress, Completed, Overdue. To delete a task, click
  next to it.

Copyright © 2010-2015, Oracle and/or its affiliates. All rights reserved.

 Related Topics